Purpose
This guide walks through the setup process to integrate Linq Blue with GoHighLevel (GHL), including, contact syncing, call recording, message routing, automation setup, and best practices for healthy iMessage deliverability.
⚙️ Prerequisites
To ensure a smooth setup and successful integration, please review the requirements below before getting started.
| Requirement | Description |
|---|---|
| Linq Blue Account |
Your Linq Blue line must be active. |
| GHL Access | Admin-level access is required to download and install apps. |
| Active Sub-Account(s) | You must have an existing sub-account in GHL |
| Linq App Admin Access |
Access to the Linq App Admin Dashboard from a desktop device is required. |
| Snapshot URL | A Snapshot URL provided by Linq to import prebuilt automations. |
| Custom JS Snippet | JavaScript snippet provided by your Partner Success Manager that enables certain Linq features in GHL |
| LeadConnector Setup (Optional) |
An active Lead connector number for inbound call-routing |
1. Agency Admin Setup
Access Linq App Admin
-
Log in to the Linq App Admin portal on desktop.
-
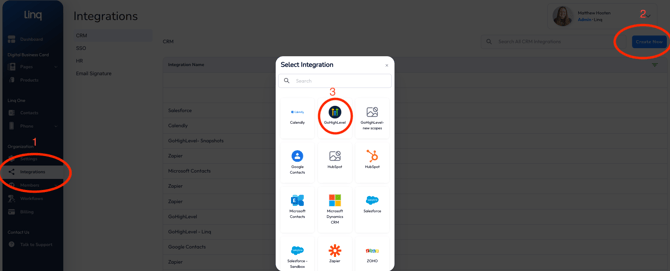
Under Integrations → Create → GoHighLevel.
-
Authenticate your GHL account using your Agency Admin credentials.
-
Click Next → Sub-Account → Check all three boxes → Close Window.
-
4. Inside the GHL Integration in Linq, activate all sync toggles.

5. Under Advanced Settings, enable all sync options (some may be hidden near the bottom).
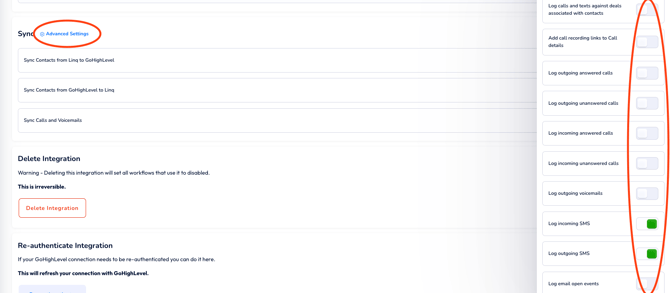
6. Click Save.
✅ Tip: Activating all sync options ensures contact, message, and call logs are mirrored between Linq and GHL in real-time.
2. Configure JavaScript for Voice Memos
Install Custom JS
-
In GHL, navigate to Agency Admin → Settings → Company → Custom JS
-
Under Custom JS, paste the Linq Voice Memo script provided by your Partner Success Manager.
-
Return to your Linq App tab → Copy your Location ID.
-
Replace the placeholder text inside the JS script (
"location_id") with your sub-account's Location ID. -
Click Save Changes → Proceed.
This enables native voice memos and transcript support in GHL.
3. Import Linq Blue Snapshot
Install the Pre-Built Automations
-
Open a new tab and visit the Snapshot URL provided by Linq.
-
Click Import Now.
-
In GHL, go to Agency View → Sub-Accounts → [Your Sub-Account] → Three Dots → Manage Client.
-
Click Actions → Load Snapshot → Linq Blue Snapshots → Proceed → Select All → Confirm.
-
The system will load all default automations, triggers, and actions.
✅ Progress Check:
You’re now ~70% integrated. The Linq dialer should appear blue inside GHL once JS and Snapshot imports succeed.
4. Enable Smart Number Assignment
-
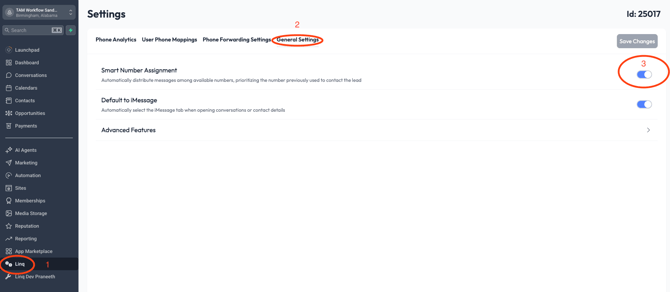
In GHL, go to Settings → General Settings.
-
Toggle Smart Number Assignment → ON → Save Changes.
What it does:
Round-Robins new inbound contacts to your team members.
Keeps conversations “sticky” — if a contact first messages Phone Number 1, replies always route to Phone Number 1.
Prevents conversation mix-ups when multiple Linq Blue lines are used.
5. User Phone Mapping & Forward Settings
-
Go to Linq →General Setting→ Smart Number Assignment.
-
Click Save.
Phone Forwarding Settings
-
Open Phone Forwarding Settings.
-
Add your cell number (temporary step) → Save Changes.
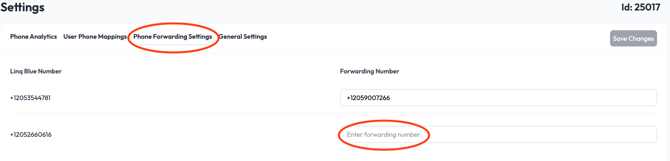
-
Copy your Linq Blue phone number — you’ll use this in Phone System GHL settings next.
6. Phone System Configuration
-
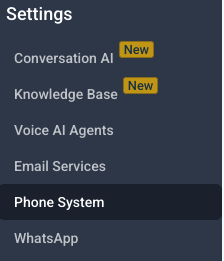
Go to GHL → Settings → Phone System.
-
Under Additional Settings → Telephone Provider, select Linq Blue.
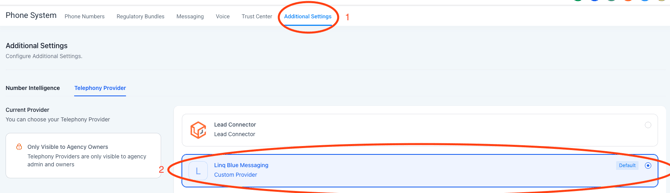
-
This makes Linq Blue your default SMS/iMessage provider.
- ⚠️ Note: this step is optional, and will make all SMS actions send via Linq Blue. Leadconnector will be unavailable for texting.
- ⚠️ IMPORTANT: ensure your workflows are designed for iMessage best practices before toggling the default provider to Linq Blue.
-
-
Go to Phone Numbers → Verified Caller ID →Add Number.


-
Paste your Linq Blue number.
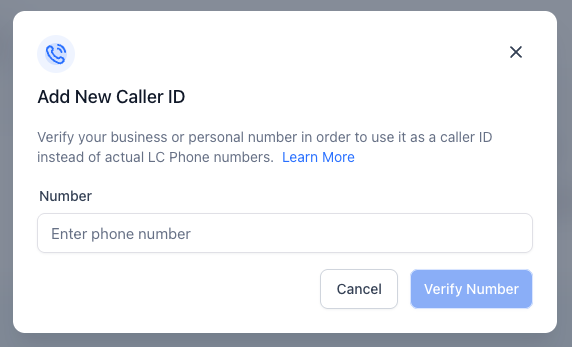
-
Click Verify and answer the call on your personal device to complete verification.
-
-
Click Edit Configuration → Check “Use verified number as Caller ID" and select the number you added from the dropdown.
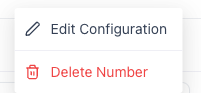
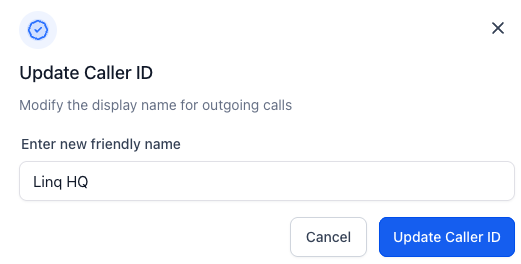
-
Enable Call Recording (both inbound and outbound).
-
Click Save.
7. Replace Forwarding Number
-
Copy your LeadConnector number (under GHL → Phone Numbers).
-
Return to Phone Forward Settings in the Linq settings.
-
Replace your cell number with the LeadConnector number.
-
Click Save Changes.
✅ You are now 100% integrated.
8. Testing the Integration
Test Messaging
-
In GHL → Conversations → New Conversation, send a message to a test number.
-
Confirm a reply appears in GHL.
-
Test Voice Notes via the waveform icon.
-
You should see the message and audio file appear instantly in GHL.
-
Test Inbound and Outbound Calling
-
From GHL, click the Green Dialer Icon and call your test number.
-
Verify:
-
Caller ID displays your Linq Blue number.
-
Call recording begins automatically.
-
-
Call your Linq Blue number → confirm it rings inside GHL (not your cell).
9. Contact Card Automations
Send iMessage and Share Contact
-
In GHL → Automations → Create Workflow → Start from Scratch.
-
Add an Action → Apps → Linq → Send iMessage.
-
Add an Action → Apps → Linq → Share Contact.
-
Email your Partner Success Manager your desired contact name and photo/logo for your phone number's contact card.
-
Once configured, when the action fires, it shares your contact name and photo with the recipient.
⚠️ Note: the “Share Contact” action cannot be the first automation step — it must follow a Send iMessage Action
10. Send Images & Videos
-
Automated Sends:
-
In GHL, include attachments in the Send IMessage Action — they’ll deliver natively via iMessage.
-
11. Post-Setup & Follow-Up
-
Add your Partner Success Manager as an Agency Admin for quick troubleshooting access.
-
Schedule a 14-Day Follow-Up Call with your Partner Success Manager to confirm:
-
Deliverability
-
Response rates
-
Automation success
-
Inbound call routing
-
12. How to Re-Authenticate (Reintegrate) Your GoHighLevel Connection
If calls, texts, or workflows stop syncing between Linq and GoHighLevel, you may need to re-authenticate the integration. This refreshes the secure connection without deleting any workflows or data.
When to Use This
Re-authenticate your GHL integration if:
-
You see authorization or permission errors in workflows
-
New calls/messages are not syncing into GoHighLevel
Steps to Re-Authenticate
-
Log into your Linq Admin dashboard on the web.
-
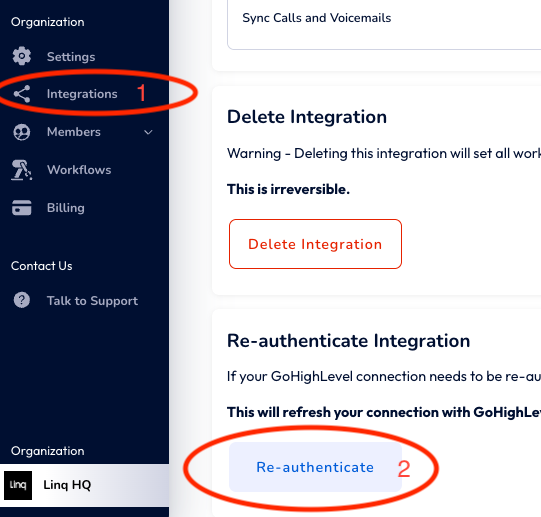
In the left sidebar, click Integrations.
-
Click your GoHighLevel integration to open its settings.
-
Scroll to the Re-authenticate Integration section.
-
Click Re-authenticate.
-
A GoHighLevel login/authorization window will open:
-
Log into the correct GHL account
-
Approve the requested permissions
-
-
Once complete, you’ll be returned to Linq and the integration status should show as connected/active again.