
What Is Line Assignment?
When your organization acquires Linq lines, those numbers are held at the organization level — unassigned and ready to be distributed. As an Admin, you can manually assign each line to a specific member of your organization so they can start using it as their work number.
Note: The number of lines you can assign is limited by the seats included in your organization's subscription.
Before You Start
When your organization acquires Linq lines, those numbers are held at the organization level — unassigned and ready to be distributed. As an Admin, you can manually assign each line to a specific member of your organization so they can start using it as their work number.
Note: The number of lines you can assign is limited by the seats included in your organization's subscription.
How to Assign a Line
Step 1 — Navigate to Phone Numbers
-
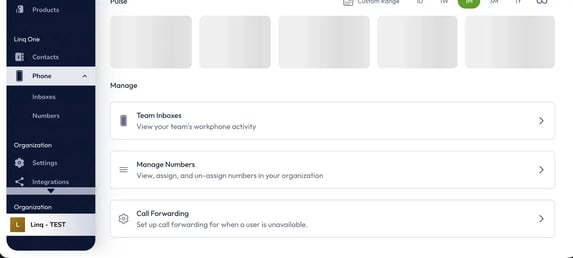
From the left-hand sidebar in your Admin Dashboard:
Dashboard → Phone → Numbers
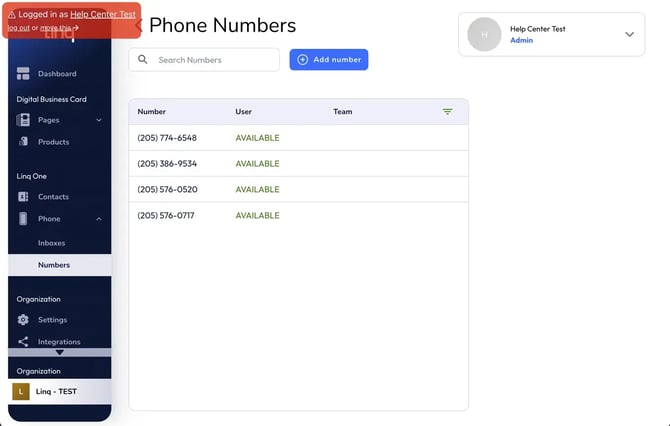
This opens the Phone Numbers page, where you'll see a table listing all lines your organization owns. Each row shows the Number, its assigned User, and the Team it belongs to. Lines that haven't been assigned yet will show AVAILABLE in green under the User column.
You can also reach this screen through Phone → Manage Numbers, which is the card labeled "View, assign, and un-assign numbers in your organization."

Step 2 — Select the Line You Want to Assign
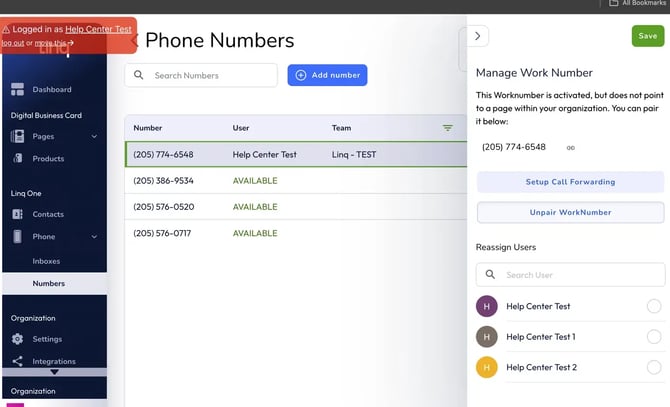
Click on any number in the list to open the Manage Work Number panel on the right side of the screen.
- Use the Search Numbers bar at the top of the table if you have many lines and need to find a specific one quickly.
- The selected number will be highlighted with a green border in the table.
The right panel will display the phone number along with an "Assign to a User" section beneath it.

Step 4 — Save Your Changes
Click the Save button in the top-right corner of the panel to confirm the assignment.
Once saved, the line will update in the table — the member's name and their team will now appear in the User and Team columns instead of AVAILABLE.
How to Reassign a Line
If a line is already assigned to a member and you need to move it to someone else:
- Click on the assigned number in the Phone Numbers table.
- The right panel will open as Manage Work Number and show a Reassign Users section (instead of "Assign to a User").
- You'll also see two additional options:
- Setup Call Forwarding — configure what happens when the user is unavailable.
- Unpair WorkNumber — remove the line's association with the current page entirely.
- Select the new member from the list and click Save.
Reassigning a line immediately moves it from the current member to the new one. The previous user will lose access to that number.
What You Can Do from the Phone Numbers Page
| Action | How |
|---|---|
| Assign an available line | Click the number → select user → Save |
| Reassign a line to another member | Click the number → select new user under Reassign Users → Save |
| Unpair a work number | Click the number → Unpair WorkNumber |
| Set up call forwarding | Click the number → Setup Call Forwarding |
| Find a specific number | Use the Search Numbers bar |