
How Others Save Your Contact
When someone opens your Linq Page, they’ll see an “Exchange Contact” button at the bottom of the screen.
-
Tapping this button allows them to save your contact information directly to their phone.
-
If the visitor also has the Linq App and a page set up, both of your contact details will automatically exchange and appear in each other’s Linq Contacts.
💡 Tip:
Make sure your contact information is up to date by tapping Edit Contact Info (next to your name at the top of your page). This ensures others download the correct details.
How to Collect Their Information
By default, Linq does not automatically save a visitor’s information when they view your page.
To collect their details, you can use one (or both) of the following methods:
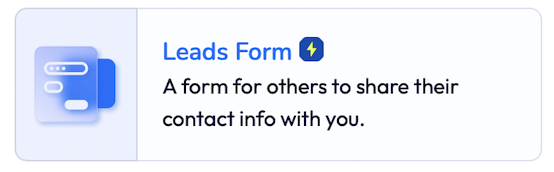
Option 1: Add a Lead Form
Use a Lead Form to capture visitor information directly on your page.
How to set it up:
-
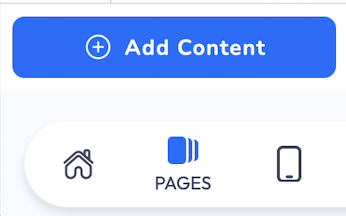
Go to your page and tap Add Content.
-
Choose Leads Form from the content list.
-
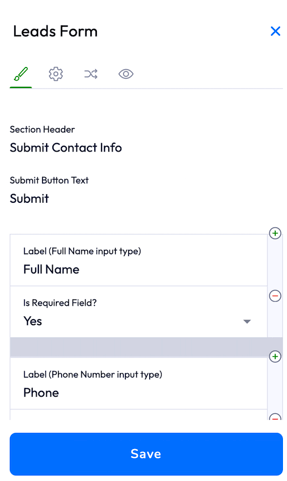
Add the fields you want (name, email, phone, etc.).
-
Edit the Section Header and customize your form layout.
To make it appear automatically:
-
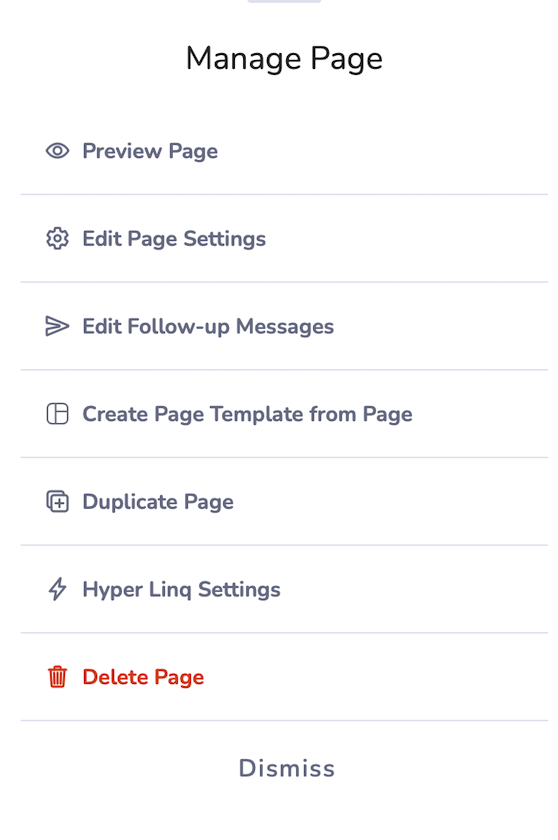
Tap 3 dots on page.

-
Click edit page settings.

-
Enable Auto show exchange form.
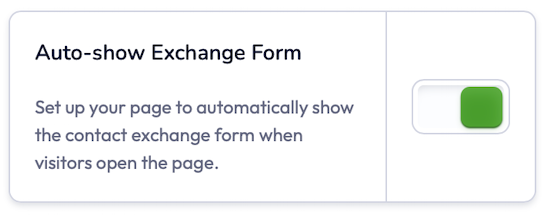
When enabled, the Lead Form will automatically pop up the first time someone visits your page.
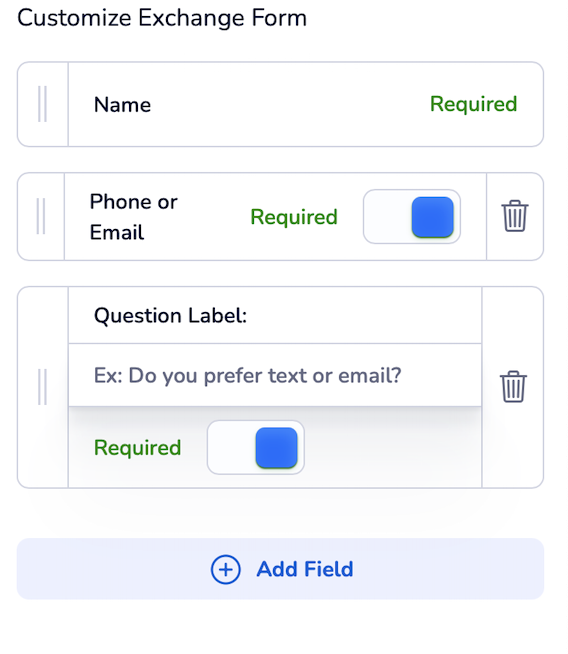
Option 2: Customize Your Exchange Contact Form
This method ensures you collect details during the contact exchange process — right before someone saves your info.
How to set it up:
-
Tap the three dots (⋯) at the top of your page.
-
Select Edit Page Settings.

-
Scroll down to Contact Form Fields.
-
Add or edit fields (name, company, reason for connecting, etc.).
These custom fields will appear when visitors tap Exchange Contact — prompting them to share their info as they download yours.
This option has the highest success rate for capturing leads and details.
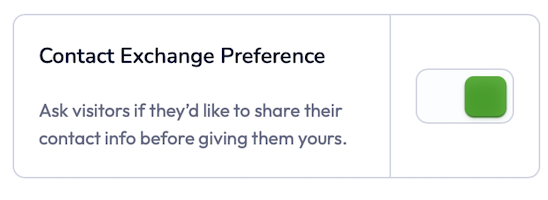
Require Info Before Contact Download
If you prefer visitors to share their details before downloading your contact, enable Contact Exchange Preferred.
To enable:
-
Tap the three dots (⋯) at the top of your page.
-
Select Edit Page Settings.
-
Find the Contact Exchange Preferred toggle.
-
Turn it on (green).
Once enabled, visitors must fill out your form before they can download your contact.
Summary
| Setting | Where to Find It | Purpose |
|---|---|---|
| Lead Form | Add Content → Leads Form | Collect info via form on your page |
| Display Mode: Auto-show | Edit (⚙️) → Display Mode | Pops up form automatically |
| Contact Form Fields | Edit Page Settings | Add required fields for contact exchange |
| Contact Exchange Preferred | Edit Page Settings | Require info before they download your contact |